Overview
You can change how the Master List looks and how it orders things. Make it dense or roomy, show where items live, and decide whether categories, projects and scheduled tasks get their own spot in the list.
Opening View Options
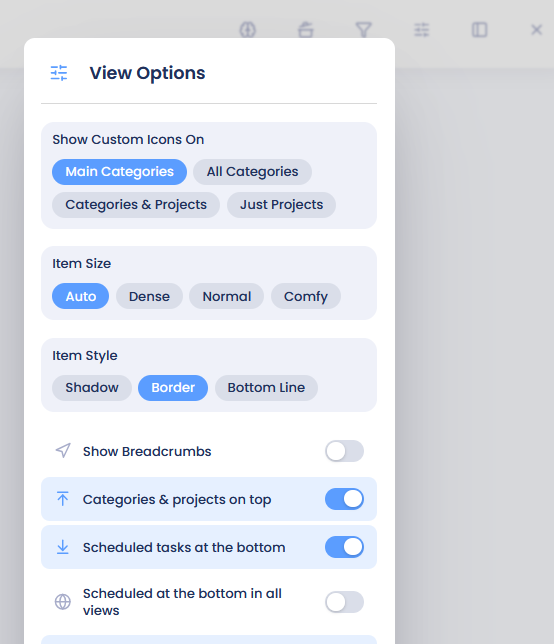
Open the Master List and click the sliders icon (Configure View) in the top right. The View Options panel opens.
Some options only appear in Column View or List View. Switch views with the icons in the Master List header, or press V.
Look
Show Custom Icons On: choose where your category icons show: Main Categories, All Categories, Categories & Projects or Just Projects (default: Just Projects).
Item Size: how tall items are in the Master List: Auto, Dense, Normal or Comfy. Auto uses the same size as the rest of Marvin (default: Auto).
Item Style: Shadow, Border or Bottom Line (default: Border). Column View and List View each remember their own style.
Show Breadcrumbs: show the path to where each item lives. Column View and List View each have their own switch (default: off).
Show Category Counts: show item counts next to categories and projects (default: off).
Show colored bar for categories: a colored bar on the left edge of each category (default: on).
Group Items by Category (List View only): group the list under category headers (default: off).
Order
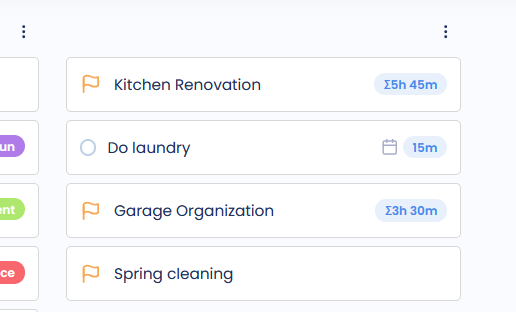
Categories & projects on top: categories and projects are listed before tasks. Turn it off to keep them mixed in with your tasks in the order you put them (default: on).
Scheduled tasks at the bottom: tasks that already have a date move to the end of the list, earliest date first, with recurring tasks last. Turn it off to keep scheduled tasks where you put them (default: on).
These two order settings sync across your devices, and so do Item Size and Show Custom Icons On. The other options are saved on the device you set them on.
These options are for the web and desktop app.
Tip: If your Master List feels crowded, try Item Size set to Dense with Item Style set to Bottom Line.