Overview
Notebooks give every project and category a whole notebook instead of a single note. The note you already had becomes page 1, and you can add as many pages as you like, group them into sections, and keep standalone notebooks that don't belong to any project.
Notes in a notebook also outlive their project. When you complete a project, its notes are kept automatically, and when you delete a project you can choose to keep them. You can always find them again on the Notebooks screen.

Turning it on
Turn on Notebooks in your Features list (in the Extras group). When you turn it on, you can choose where to put a Notebooks button: the skinny sidebar, the sidebar or the bottom menu.
Notebooks also works on mobile. You can turn it on from the Features screen on your phone.
Opening your notebooks
You can open the Notebooks screen in any of these ways:
Press Shift+B
Click Notebook in the main menu (☰)
Click the Notebooks button you placed in your sidebar, skinny sidebar or bottom menu
On mobile, tap Notebooks in the bottom bar
What the Notebooks screen looks like
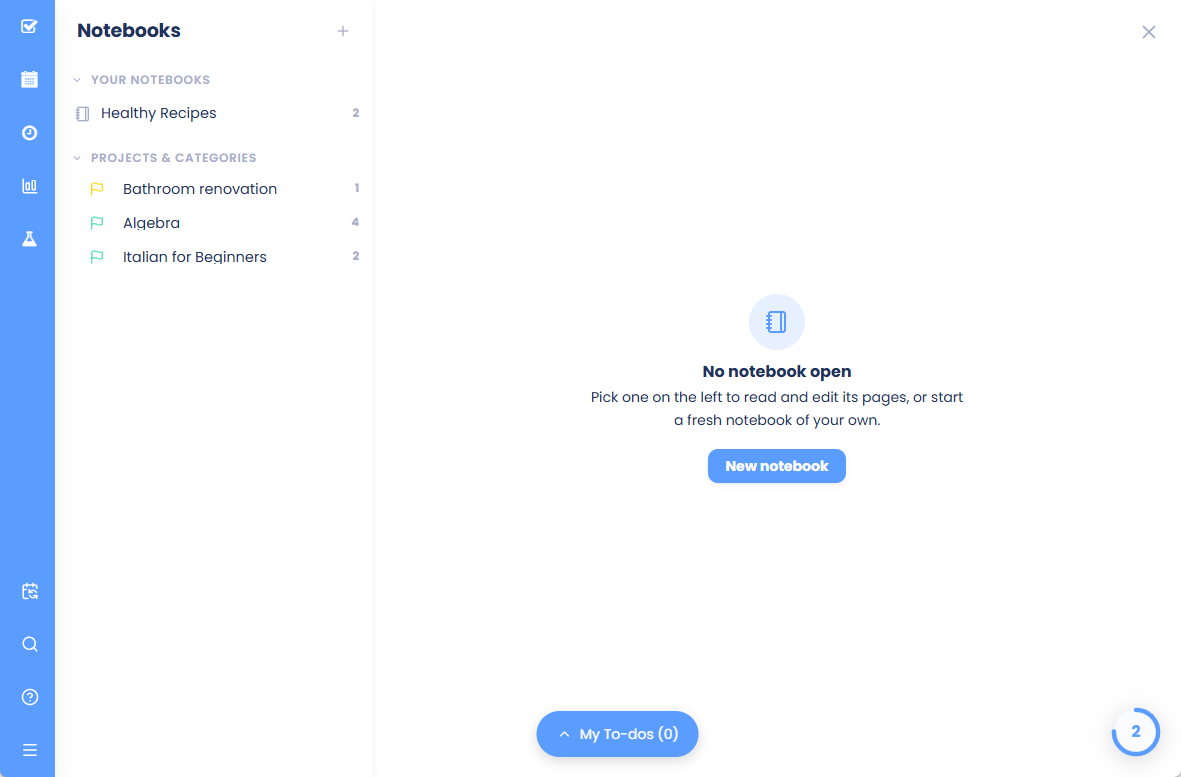
The Notebooks screen has a list on the left and the open page on the right. The list is split into four groups:
Your notebooks: standalone notebooks you created with the + at the top or New notebook.
Projects & categories: every open project and category that has a note. They appear in the same order as your Master List. Projects and categories without notes are left out so the list stays short.
From completed projects: notes you kept from projects you completed or deleted. Each notebook is named after its project.
From archived & removed projects: notes that still belong to a project that is archived or no longer in your lists.
Click a group's name to collapse or expand it. If you use Backburner, notebooks from backburnered projects are hidden. Click Show backburner to show them.
Click any notebook to open it. The left side then shows that notebook's pages and sections, and the right side shows the page you pick. Use the arrow at the top, or the Notebooks link in the breadcrumb above the page, to go back to the full list.
Good to know:
The Notebooks screen is for your notes. Clicking a project there opens its notebook, not the project itself. To work on the project's tasks, open the project from your Master List as usual.
Each page shows when it was last edited (see Settings below).
The Notebooks screen doesn't have its own search box yet.
Adding pages and sections
Open the note of any project or category:
Click the + next to the note picker to add a new page.
To group pages, add a Section at the bottom of the page list, then drag pages under it.
On mobile, open a project or category and tap its note, then tap the All notes row to see the whole notebook. Use + Note and + Section at the bottom of the list. To reorder a page, open its menu and choose Move up or Move down.
Each page has a menu where you can Rename, Duplicate, Save to Notebooks (for project and category pages), Move to..., move it into or out of a section, or Delete note. Deleted notes go to the Trash, so you can get them back.
A section's menu lets you add a New note in section, collapse or expand the section, or Delete section (notes kept).
When you complete or archive a project
Completing a project keeps its notes automatically. The project's notebook moves to From completed projects on the Notebooks screen, named after the project, with all its pages and sections. A message confirms this, and you can click it to undo.
Nothing is moved to a separate archive and nothing is deleted. You can keep reading and editing these notes, add pages, or use Move to... on a page to give it to another project or category.
Archiving a project leaves its notebook attached to the project. While the project is archived, you'll find its notes under From archived & removed projects. If you bring the project back, its notebook goes back to Projects & categories.
When you delete a project
If a project has notes, Marvin asks whether you want to keep them:
Keep notes moves them to Notebooks
Delete them sends them to the Trash with the project
On desktop/web, tick Always do this if you don't want to be asked again. On mobile, choose this in the Notebooks settings under When a project is deleted (Ask me, Keep the notes or Delete them).
What about task notes?
Notebooks are for projects, categories and your own standalone notebooks. Tasks keep their single note, and task notes don't appear on the Notebooks screen.
When you complete a task, its note stays with the task. To find it later, open Search, tick Search notes, and include done items in the results.
Settings
Show page title and edited date: shows the page title and when it was last edited at the top of each page (on by default)
Auto-title from first heading: names a page after its first heading (off by default). While this is on, pages can't be renamed by hand.
On mobile these settings are called Page title line and Name pages automatically.
Tip: A single page can hold a lot of text (up to 750KB), and pages only load when you open them, so even big notebooks stay fast.
Ways to use Notebooks
Project reference. Keep meeting notes, decisions, research and links on separate pages inside the project, grouped into sections like "Planning" and "Notes from calls".
Areas of your life. Give a category such as Health or Home its own notebook for things that don't belong to any one task.
A record of finished work. Because completed projects keep their notes, the From completed projects group becomes a history of what you did and what you learned. The edited date on each page shows when you wrote it.
Standalone notebooks. Use Your notebooks for journals, reading notes, or anything that isn't tied to a project.